By: Malka Kopolovich, Lubicom Staff
For whatever reason, your children aren’t at camp, and that’s totally cool with me. Without going through all the possible reasons, I have decided to save you from having your children say the “B” word.

Dare I quote the forbidden statement being said by countless children whose mothers decided to keep them home for the summer? You’ve heard it before. The clock barely strikes 9 a.m. as your child creeps through your bedroom door and says, “Mommy, I’m bored.”
Lucky for you, I’ve teamed up with Sara Goldstein from @tomatoes_tomahtos on Instagram to give you ideas on how to avoid hearing that statement and become the head counselor of your own Mommy Camp!
For the sake of the article, we’re sticking with the name Mommy Camp. However, these ideas are definitely not limited to mothers only. Fathers, babysitters, and actual camp counselors – take notes! These activities are perfect for those moments you need improvisation.
(This post contains Amazon affiliate links. Kosher.com is a participant in the Amazon Services LLC Associates Program, an affiliate advertising program designed to provide a means for sites to earn advertising fees by advertising and linking to Amazon.)
1. Ceramic Painting
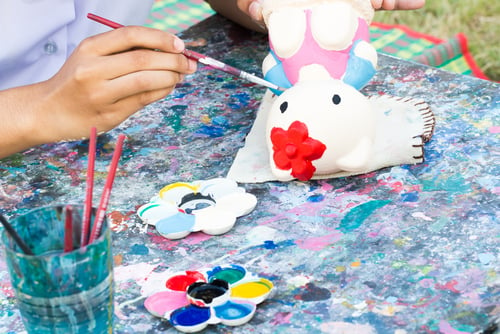
This is perfect for the ones who enjoy ceramic paint shops, without the hassle of having to go pick up your creations a few days later. You can store a couple at home with cheap paint kits, and pull them out when needed! Set up your table with a disposable tablecloth, cups of water to clean the brushes, and a spot to dry your masterpieces. Dress each child in clothes that are all right to get messy in or have them wear disposable aprons.
2. Slime
Every kid’s favorite activity! And, I will admit, it’s my favorite, too!
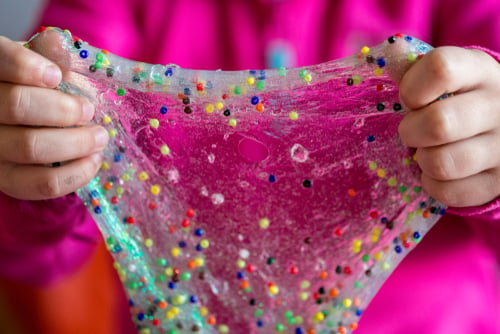
Use this basic formula to make your own slime:
- 5 ounces Elmer’s Glue
- 1/2 tablespoon baking soda
- 1 tablespoon contact lens solution
If it gets too sticky, add another 1/4 tablespoon contact lens solution and knead. Keep adding 1/4 tablespoon contact lens solution until desired consistency.
Make it fun with glitter or glow in dark glue, or add in beads for some ASMR satisfaction.
3. Glow-in-the-Dark Bowling
You can play at night on the grass, or play indoors with the lights out during the day.
You will need:
- 10 and 3/4-filled water bottles
- Glow sticks
- Soft ball
Remove the labels from your water bottles. Crack the glow sticks to activate them (according to package directions) and drop one glow stick in each bottle. Make sure each bottle is closed and secured to avoid a mess. Line the bottles up like bowling pins, have each child stand about 10–15 feet from where the pins are, and make sure to keep score!
4. Graffiti
Okay, we are not teaching your children to vandalize here! Make sure they are aware that they can only spray what and where you say is okay to paint.
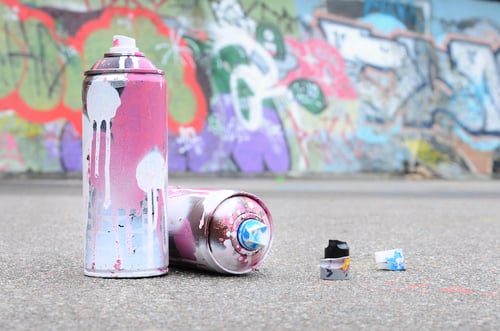
You will need:
- However many aerosol spray bottles you need, depending on the amount of paint and children
- Different color paints
- Water
- White paper/canvases
Pour paint until the half line, and add water until the top. Cover tightly, shake to mix, and spray!
5. Slip ‘n Slide & Pool Chill
Put an extra-long tablecloth on a slight hill – a grassy and NOT rocky part of a lawn. Have a hose lightly pouring water from the top, add some soap, and you have a homemade slip ‘n slide!
And if you want to give your children a mini staycation, an inflatable pool with bath toys, bubbles, fun drinks, and finger foods is super fun.
6. Beach Bear Snacks
Being creative with food is awesome. You get to have fun, admire your work, and then eat it, which I think is an ultimate win.
You will need:
- Graham crackers
- Rainbow sour belts
- Teddy bear cookies
- Blue frosting
Spread blue frosting on a graham cracker to look like water. Crush graham crackers to create “sand” overlapping the “water,” put a sour belt on the sand as a “towel,” and put a teddy bear cookie on a towel. Admire your tanning bear friend, and then eat him!
7. Theme Day
Pick a day, set a theme, and plan activities with that theme. Include a game, craft, food, and even an outing! Bonus points if you make it a little educational! You can go all out, or keep it simple. If you’re in the mood to be extra, dress your kids and yourself up according to the theme, too!
Here are some ideas. Run with them!
- Nature Day
- Include a scavenger hunt outside, where each member has to find different things like birds, leaves, bugs, etc. For the little members who can’t read, print or draw pictures! Keep it safe and clean, and make sure to give out nature-themed prizes.
- Bug cupcakes! Decorate cupcakes with different stripes of colors, pretzels for antennas, and gummy candy eggs with the “yolk” part removed and replaced by chocolate lentils for eyes.
- Pretend binoculars with empty toilet paper tubes, strings going through and around as a necklace, and glitter glue/paint to decorate.
- Animal Day
- Play monkey in the middle, pin the tail on the donkey, or any other animal-themed games.
- You can make the beach bear snacks, or decorate cookies and cupcakes to look like animals.
- Dress up like animals and make your own props at home.
- And if possible, go to the zoo with each member in your group dressed as the animal they want to see the most!
- Olympics
- Have each child come up with their own country they want to represent and have tournaments! Play basketball, kickball, bowling, checkers, and other sports!
- Give out medals
- Have them say winning (or losing) speeches
8. Messy Twister
What you need:
- Twister mat
- Aluminum pans
- Shaving cream
- Food coloring (red, yellow, blue, green)
Mix shaving cream with food coloring in a disposable pan (use a separate pan for each color). Scoop colors onto coordinating Twister mat. Play Twister, and when kids come tumbling down in a shaving cream mess, squirt them with the hose!
9. Puppet Show
Decorate a brown paper bag or use a kit, set up a stage (table with cloth for “curtains”) and let the show begin!
10. Moon Sand
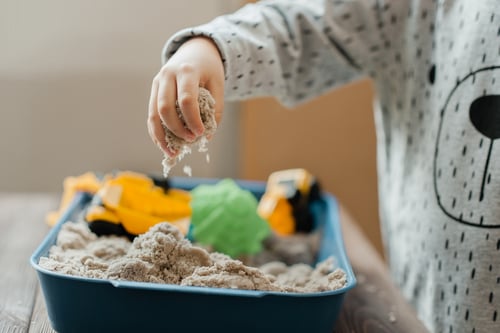
Ingredients:
- 8 cups flour
- 1 cup baby or coconut oil
- Few drops of food coloring of your choice.
Mix in a large flat storage container for a “sandbox,” and keep the sand in the box to avoid a sandy mess. An actual sandbox is resourceful as well.