
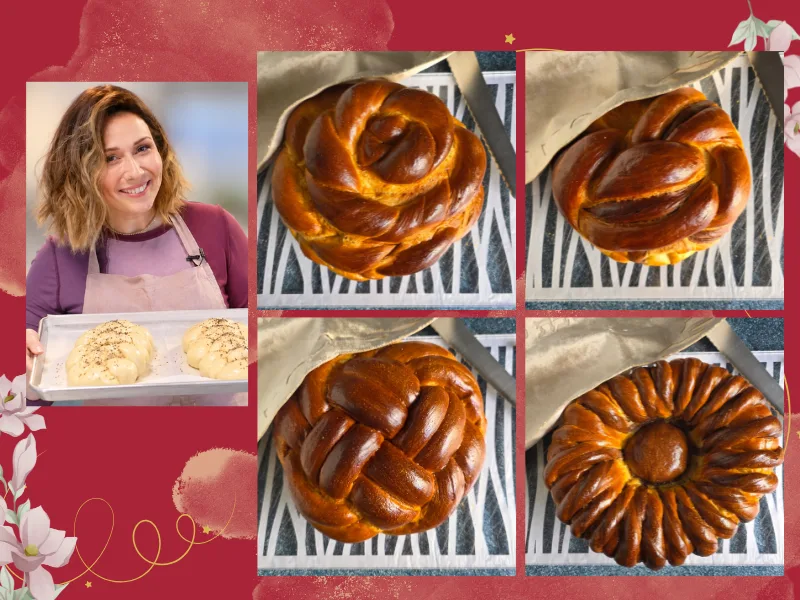
If your strands are sticking, the braid cracked, the center sank, or the outside looks perfect but you’re pretty sure the inside is still raw, I’ve got you. These are my most useful challah tips, covering everything from dough and proofing to shaping, baking, freezing, reheating, and a full troubleshooting section for all those “What do I do now?” moments.
Dough
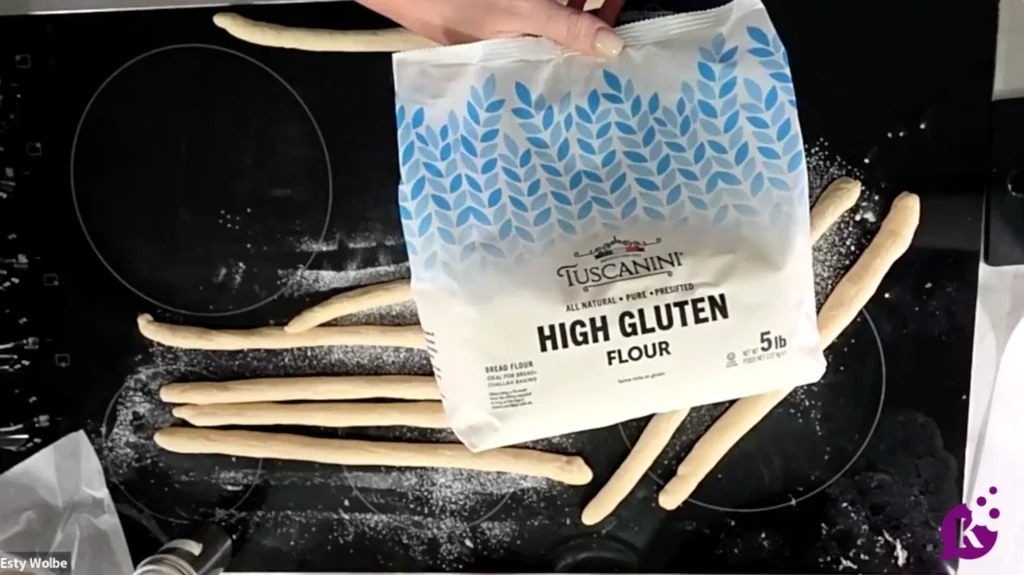
- I reach for high-gluten flour because I like the structure it gives challah. (Tuscanini is best!) All-purpose works for this recipe if that’s what you have, and white whole wheat works too.
- If you’re adding raisins or other inclusions throughout the whole challah, add them right into the dough from the start so they’re more evenly distributed.
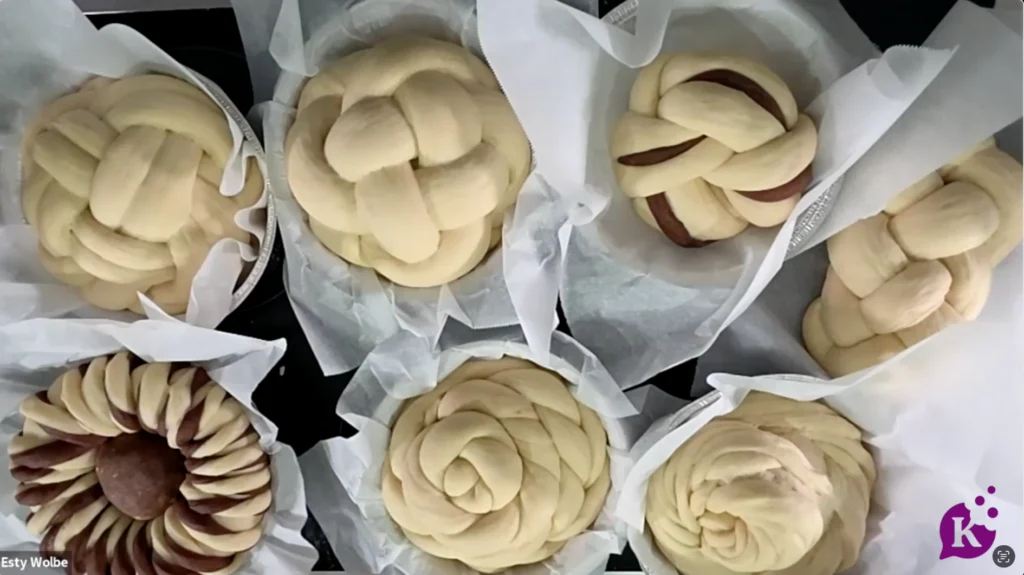
- For a two-tone challah, pull off some dough before the first rise and knead cocoa into it. Start with a few tablespoons and keep going until the color looks right. It won’t affect the taste!
- If the cocoa makes the dough dry, add a few drops of oil and work it in until the dough softens back up.
- I let the Bosch do the heavy lifting. Once the dough comes together and pulls away from the bowl, I give it a 3-minute rest, then knead on speed 2 for 3 minutes.
First Rise
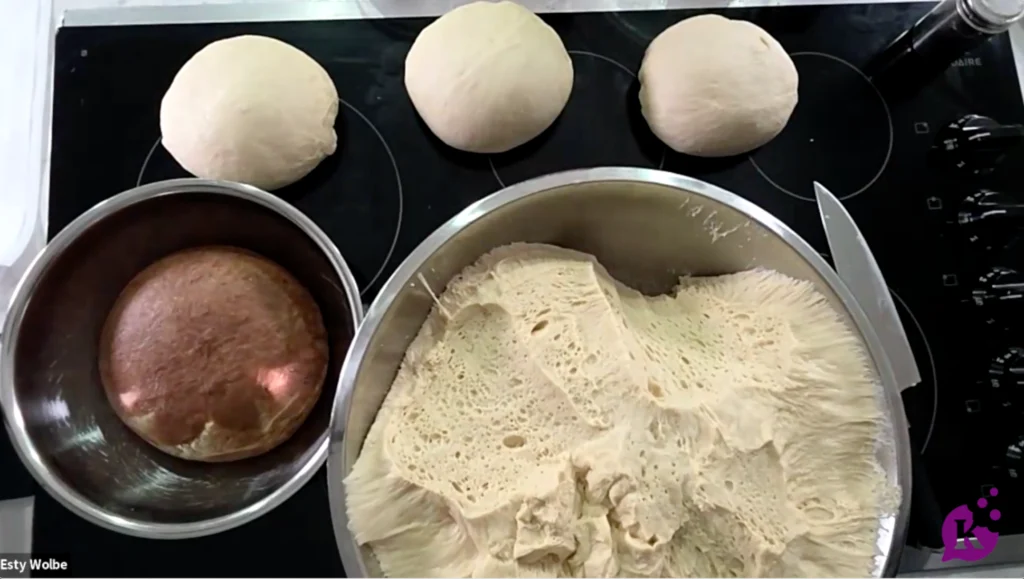
- The first rise is usually around 1½ hours. Your dough should roughly double in size, feel fluffy, and have that almost spiderweb-like gluten structure inside.
- I don’t punch down my dough after the first rise. I go straight from risen dough to dividing and shaping.
Making Dough Ahead
- If you’re making dough the night before, put it straight into the fridge before the first rise. In the morning, let it warm up until it relaxes and becomes easy to work with again.
- A warm kitchen will get your dough moving much faster than a cold one.
- In humid Florida, I cut back on the water instead of getting stuck in the endless “sticky dough, add more flour” cycle.
- I don’t recommend freezing raw dough. I’d rather freeze the challahs once they’re baked.
Portioning
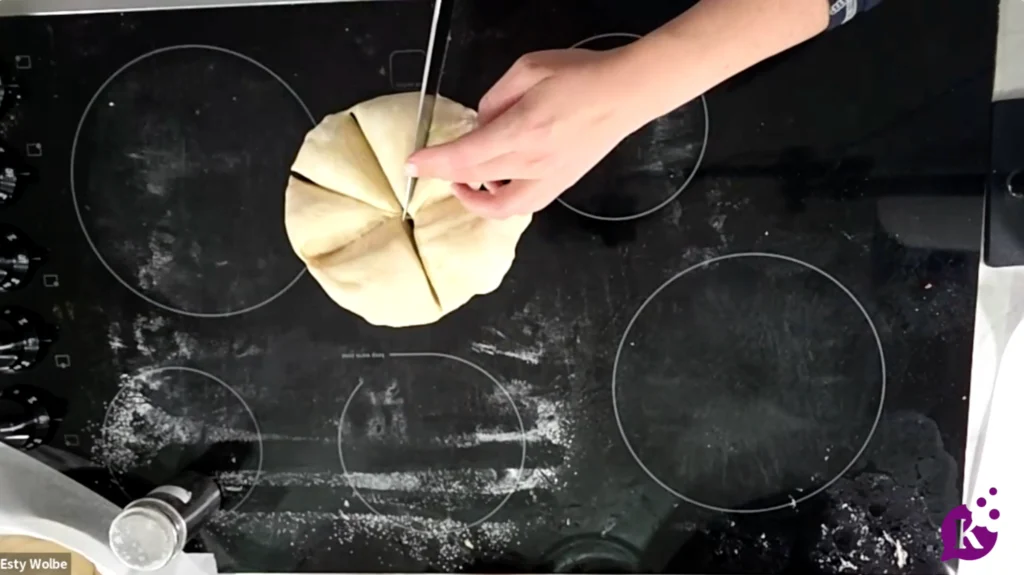
- I usually get 6 regular oval challahs from one batch, but for Rosh Hashanah rounds, I make 5 so they’re bigger and fuller.
- For this class, most of the loaves were around 800 grams / 29 ounces, though I sometimes make them closer to 650 grams. Loaf size is really your preference.
- Weigh your whole challah portion first, then divide that into however many strands your braid needs. That way, a 4-strand and an 8-strand challah can still come out around the same size.
- Turn any extra dough into cinnamon buns or babka.
- Don’t stress about every strand being exactly the same size, especially with round challahs where the ends usually get tucked underneath anyway.
Rolling
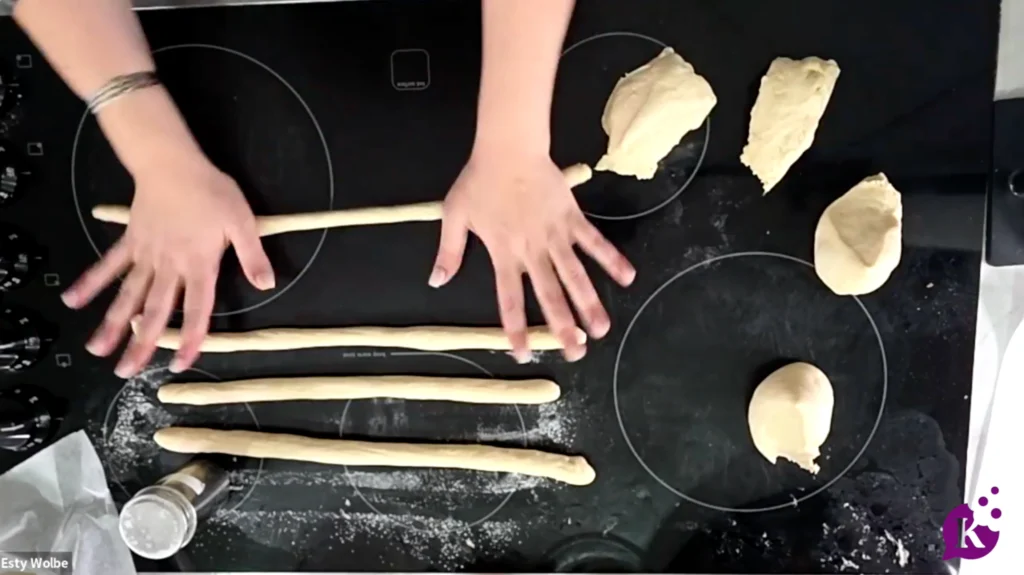
- After dividing the dough, let it rest for a bit. Freshly handled dough can be tight, and resting gives it more stretch and makes it easier to work with.
- When rolling strands, start in the center and move your hands outward with even pressure.
- Don’t panic over little wrinkles or lines in the strands. They often smooth out as the challah rises and bakes.
Braiding Tips
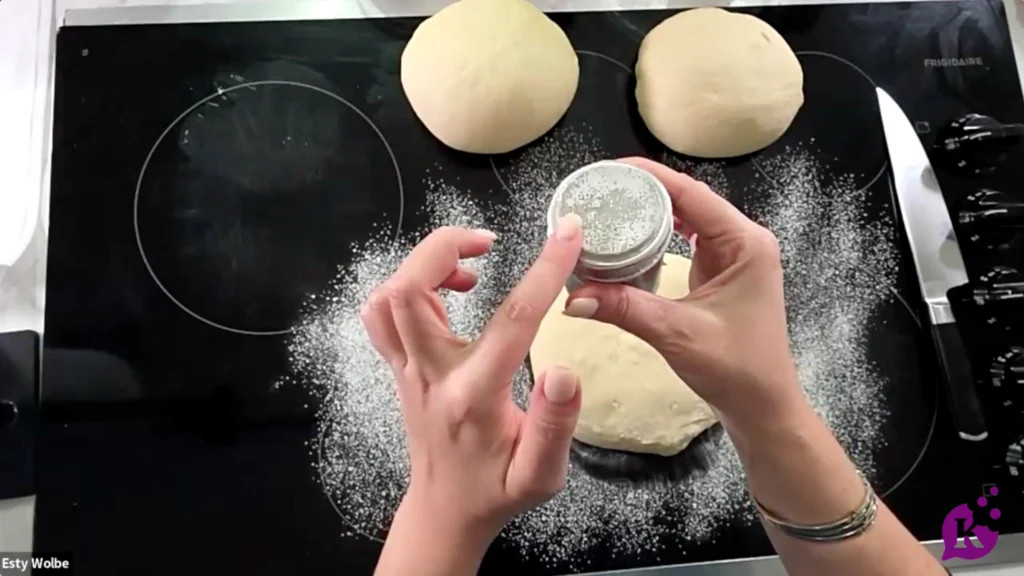
- I like giving the strands a light coating of flour to keep them distinct instead of letting them stick and melt into one another. I dust mine after rolling with my trusty powder shaker.
- If your challah cracks while baking, you probably braided it too tightly. Leave a little space between the strands so the dough has room to rise and expand.
- For decorative cuts and slits, I prefer a pizza cutter because it glides through the dough instead of dragging it around. (Designate a parve cutter.)
- If braiding feels like a lot, roll the dough into balls, place them together in a round pan, and let them rise into an easy pull-apart challah. Different toppings on each ball make it even more fun.
The Ball Underneath Trick
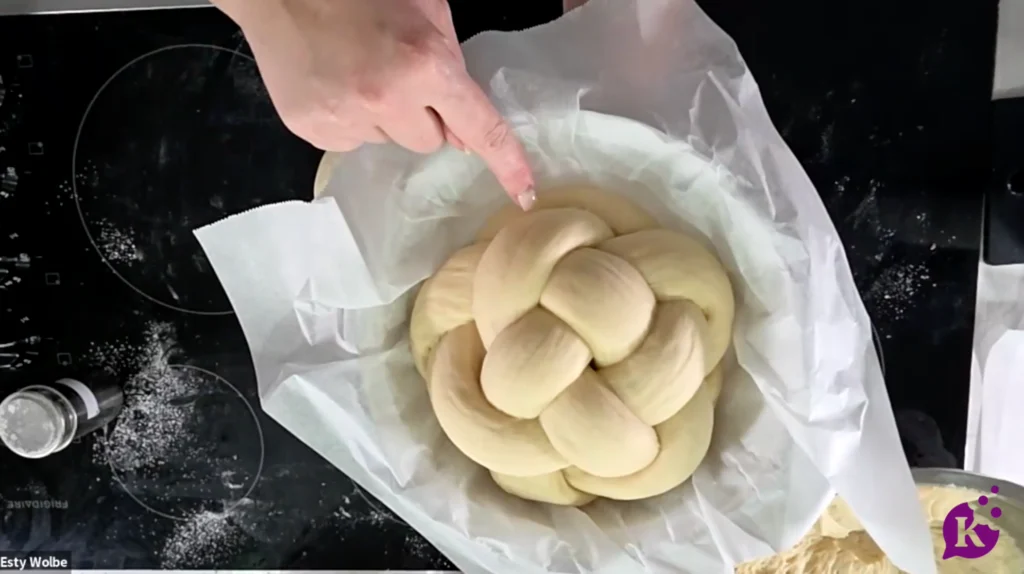
- Round braided challahs can end up with more dough around the edges than in the center. I tuck a small ball of extra dough underneath the middle to help the challah bake up taller and rounder.
- I use the same trick with regular braids too. Trim off uneven ends, roll the scraps into a small piece, and tuck it underneath the center for extra height.
Pans + Parchment
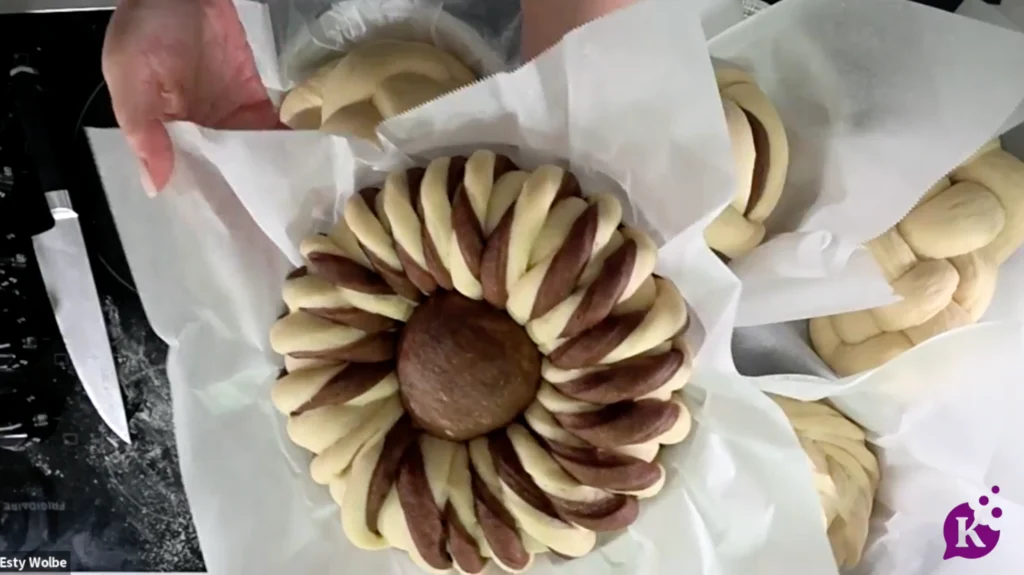
- I prefer an 8-inch round pan to a 9-inch. The smaller diameter encourages the challah to rise up instead of spreading outward, giving you that big crown-like shape.
- A metal pan works well too, but it may bake your challah faster, so keep an eye on the timing.
- A baking sheet works, but your challah will have more room to spread. Leave enough space between loaves and make sure all loose ends are tucked securely underneath.
- Use parchment paper. It makes shaping, transferring, removing, and checking your challah much easier. If the edges stick up too much, fold or trim them down.
Second Rise
- I don’t bother covering shaped challahs during the second rise. If they dry out a little on top, I’m not worried because egg wash is coming.
- Don’t rely only on the clock. Give your shaped challah a gentle poke: if it pops right back, it needs more time. If the dent stays, it went a little too far. If it slowly fills back in, into the oven.
Baking
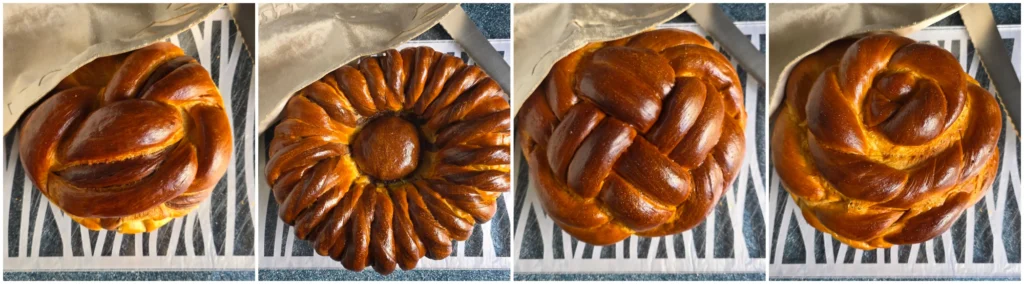
- I bake my challahs at 350°F. Regular challahs usually take around 45 minutes, while the bigger Rosh Hashanah rounds need more time.
- Instead of guessing whether a big challah is done in the center, I stick a thermometer right in. I highly recommend everyone invest in one! Once it hits 200°F, it’s done.
Freezing + Reheating
- I don’t mind if the bottom of the challah is still a little pale after baking, since I’m reheating it before serving anyway. After defrosting, place the challah upside down directly on the oven rack for 10–20 minutes so the bottom gets crisp and browned.
- Freezing challah is simple: let it cool completely, put it in a zip-top bag, and freeze it. No seven layers of foil required.
Challah Troubleshooting FAQs
Q: My strands keep sticking together. How do I get a more distinct braid?
A: Lightly flour the strands after rolling them. It helps keep the lines of the braid defined instead of letting the dough melt together.
Q: Why did my challah crack while baking?
A: You probably braided it too tightly. Leave a little breathing room between the strands so the dough has somewhere to expand as it rises and bakes.
Q: Why is the center of my round challah flat?
A: Try the ball-underneath trick. Tuck a small ball of extra dough under the center before baking to help give the challah more height and a fuller round shape.
Q: My dough keeps springing back when I roll it. What should I do?
A: Let it rest for a few minutes. Freshly divided dough can be tight, and a short rest makes it much easier to stretch and roll.
Q: How do I know when my challah is done with the second rise?
A: Give it a gentle poke. If it springs back right away, it needs more time. If it slowly fills back in, it’s ready for the oven. If the dent stays, it has gone a little too far.
Q: My dough is really sticky. Should I keep adding flour?
A: Not necessarily. Warmth and humidity can make a big difference. In a very humid kitchen, I prefer cutting back a little on the water rather than endlessly adding more flour.
Q: How do I know if a big round challah is baked through?
A: Don’t judge by color alone. Stick a thermometer into the center. Once it reaches 200°F, I consider it done.
Q: My challah is spreading instead of getting tall. What can I do?
A: Try a smaller round pan. I prefer an 8-inch pan because it encourages the challah to rise up instead of spreading outward.
Q: The bottom of my challah is pale. Did I underbake it?
A: Not necessarily. I actually like a slightly pale bottom if the challah is being frozen and reheated. After defrosting, flip it upside down directly on the oven rack for 10–20 minutes to crisp and brown the bottom.
Q: Can I freeze raw challah dough?
A: You can, but I don’t recommend it. I get better results freezing fully baked challahs or refrigerating dough overnight before its first rise.
Watch how to make Esty’s Favorite Round Challah Braids for Rosh Hashanah here!


Photos from Our Community
See how these recipes turned out in real kitchens. Photos from home cooks will appear here as they're shared.
Tell Us What You Think
Your review could help someone decide what's for dinner tonight. Log in to join the conversation.
Log in to join the discussion0 Comments
Do you want to rate this post?
Edit your rating
Choose a new star rating and save it.
Moderation
Report
Kosher Comments
Kosher Comments
Add a link
Posting comment
Your comment will be posted in a moment...