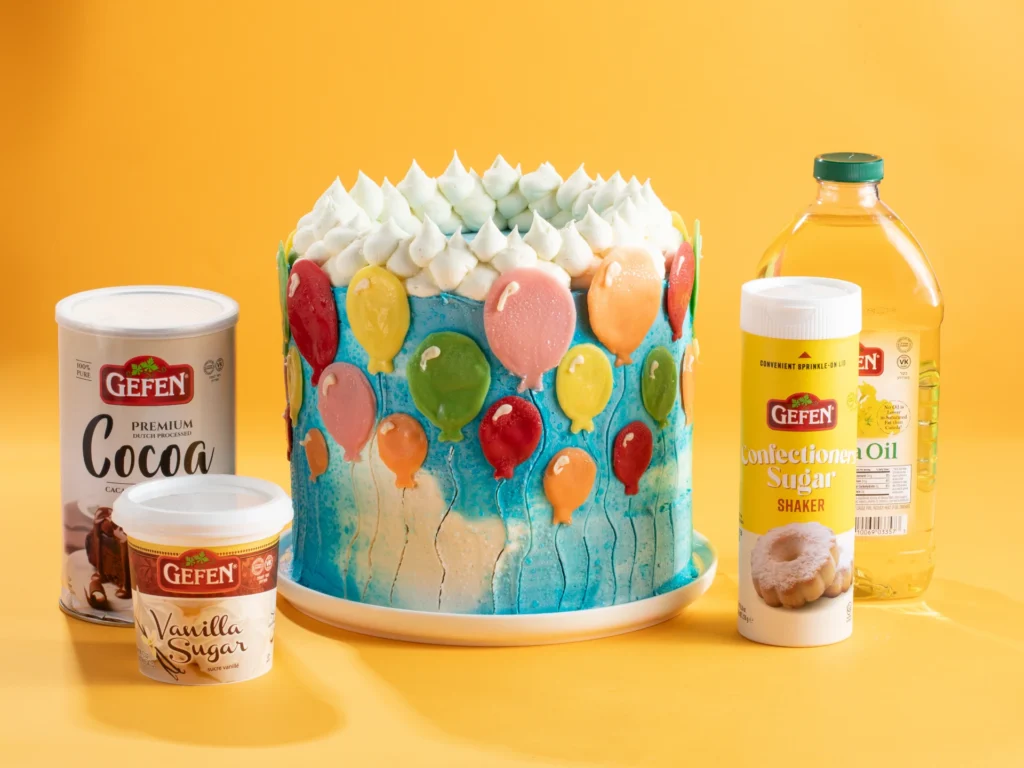
Flying in the Sky Balloon Cake

Jump to Ingredients

The birthday child will be on cloud nine with this whimsical, dreamy cake! Colorful balloons float in the sky, celebrating their birthday with joy and color! This will be the memorable centerpiece of any birthday party, so roll up your sleeves and get ready to whip up something spectacular!

Please read the directions through carefully before getting started.

2h 30m 10
Medium Vegetarian Pescatarian Parve Freezer-Friendly

Contains: Egg, Gluten, Wheat

Directions

Prepare the Cake

  1. You will need three 9-inch cakes with a three-inch rim for either cake. That means that you will need to make this recipe three times, as this recipe yields just one nine-inch cake.

  2. Preheat oven to 350 degrees Fahrenheit. Spray a nine-inch round cake pan with baking spray and set aside.

  3. Beat sugar, salt, baking soda, vanilla sugar, eggs and egg yolk for one minute. Add orange juice and oil and beat to combine. Add flour and mix for two minutes. Mix in the cocoa and hot water and mix for another three minutes. Fill prepared pan with batter. Bake for an hour.

  4. Repeat until you have three baked cake layers. Cool completely before frosting.

Prepare the Frosting

  1. Beat margarine and shortening until creamy. Add rest of ingredients and beat for about two minutes. Keep refrigerated until using.

Layering and Frosting the Base Cakes

  1. Spread a generous layer of frosting over the first cake. Place another cake on top. Repeat and then place a mound of frosting on the top layer.

  2. Using a spatula, place globs of frosting around the perimeter of the layered cakes.

  3. Using a cake smoother, smooth the frosting around the cake and on the top. At this point, you will see crumbs all over the frosting, and that’s okay! This part is just called crumb coating, forming the outer layer of frosting for the cake. Place in the freezer for at least 30-45 minutes before continuing with the directions for either cake.

Decorating

  1. Tint about half of your frosting blue.

  2. Using a spatula, place mounds of blue frosting around the cake and on top of the cake. Using a cake smoother, smooth the blue frosting around the cake and on top of the cake until the frosting is smooth.

  3. Fill a bag with white frosting and snip off a large corner. Pipe random dots of white frosting around the perimeter of the cake on the blue frosting.

  4. Gently scrape the dots of white around the cake using a cake smoother to create a “cloudy” look. You may need to repeat this step of adding dots and scraping until you are satisfied with the look. Place in the freezer while you prepare the balloons.

  5. To prepare the balloons, place the template on a cookie sheet and place a sheet of parchment paper over it. Melt different colors of colored chocolate and fill a pastry bag or Ziploc bag with melted chocolate. Cut off a small tip and pipe balloons using the template as your guide. Start by tracing the shape of the balloon with chocolate and then filling the inside of the balloon with chocolate. You can use a toothpick to perfect the shape. Place it in the freezer for two minutes to harden. You should have a set of at least six balloons per color.

  6. Remove cake from freezer and arrange colorful balloons around the top part of the cake.

  7. Use a toothpick to draw swirled lines under each balloon, for the string of the balloon.

  8. Add a cloudy look on top of the cake by piping a layer of large white dots of frosting and then more dots on top of it in three to four layers.

Credits

Notes:
Make ahead instructions: The cake can be stored after assembly either at room temperature for up to two days, or in the refrigerator for up to five. It should be covered either with a box or plastic wrap. Remove 30 minutes before serving.
The baked cake layers can be frozen up to three months. Cool completely, then wrap tightly in plastic wrap and foil. Freeze until ready to assemble.
The frosting can be made in advance and stored for one month in the freezer or one to two days in the fridge. Let it return to room temperature and rewhip before using.
Frozen components should be thawed slowly in the refrigerator.

The chocolate balloons decorations can be prepared and stored separately in either the freezer or refrigerator. Assemble on the cake on the day of serving to maintain crispness.

Description:
Styling and photography by: Fraidy Feldman

Suggested Recipes

Explore

balloons birthday cakes cake decorating colorful Faigy Stein freezer friendly kids presentation showstopper
Did you make this recipe yet?

What Cooks Are Saying

4.0 out of 5

1 global rating

5 star
0%
4 star
100%
3 star
0%
2 star
0%
1 star
0%

Photos from Our Community

See how these recipes turned out in real kitchens. Photos from home cooks will appear here as they're shared.

Tell Us How It Went: Share Your Experience

0 Comments