Since starting my challah baking business, TGIS Challah, I have been approached over and over again by people telling me how they wish they could bake challah but, “I don’t have the need to bake a five pound batch of challah weekly,” or “I don’t have the time,” or “I don’t have the mixer I need.” Finally the most common, “I’m not meant to bake challah, it doesn’t work for me,” which is always followed by 99 reasons, questions, and traumatic challah baking experiences.
In my quest to bring you the ultimate challah baking blog post, I used Instagram to reach out and collect questions, find answers, and spark friendly discussions about challah and bread baking. Some questions were easily answered and quite a few required some research and experimentation on my part.
The result? I am here to tell YOU nothing is impossible. You do not need to make a full five-pound batch of challah dough nor do you need a mixer. Challah baking can be done by anyone and you may surprise yourself. Try these tips and recipes, and you may just find yourself doing it all over again next week.
The most important thing to remember:
When making challah by hand or even by mixer, a recipe is just guideline. Depending on the weather, season, brand of flour, and so on, the quantities of flour listed in a recipe are not always going to be what you will need. This does not mean challah failure! It’s not a means to deter you, it’s simply an important piece of information that will help you get to know your dough
How do I get to know my dough? (AKA When is my dough, dough?)
When making challah by hand and even by machine, it is all about the feel. Often, a recipe will call for a five pound bag of flour. When making a full batch of challah, I always start with half or a little less than the amount of flour the recipe calls for.
For example, for a full five-pound challah recipe (which can be 16,17, or 18 cups of flour depending on the brand), start with 7-8 cups, roll up your sleeves and go all in with your hands (or your mixer) until the liquid and flour are well combined. At this point your dough will most likely (if not totally) resemble a paste.
Adding another 2-3 cups, continue mixing. If the dough sticks to your hands, spray them with non-stick cooking spray or keep a bowl of oil next to you to dip your hands. The additional oil helps keep you sticky-free. Keep adding flour cup by cup until a workable dough begins to form.

A workable dough means a cohesive mass that can be kneaded, handled, and shaped without it sticking to everything it touches or crumbling from dryness. Once it’s workable, turn your dough onto a lightly floured marble pastry board or countertop. Keep folding the dough into itself until the flour is worked into the dough. If the dough feels too dry or crumbly, a little bit of oil works wonders to bring moisture and pliability back.
Spray your workspace with cooking spray as well. If your dough feels too sticky and you have already used 14 cups of flour, begin adding flour two tablespoons to a quarter of a cup at a time instead of full cups.
Remember you can always add flour, but you cannot take it away.
When using a stand mixer, you want all the dough on the sides to pull away. The dough should form a firm ball around your dough hook.
The Kneading Process
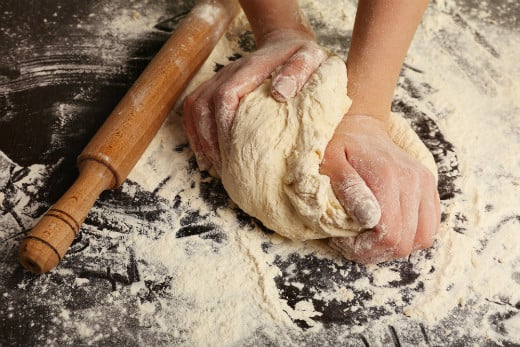
Kneading your dough is a process that helps to activate, develop, and strengthen the gluten. This will give you the soft, pliable dough you desire. It is also very crucial to work your dough well for a strong and successful rise. The “traditional” method is to semi-flatten your dough. You fold it toward you and, by using the heels (where your palms meet your wrist) of your hands, push the dough away from you with a rolling motion. Turn the dough one quarter of a turn, and repeat the process.
But the fun doesn’t stop there! When kneading challah or any bread or yeast dough, the gluten can get very stiff. By taking a break, you and the dough (mainly the gluten) get a moment to relax. Tension (in both of you) subsides, and the dough magically becomes easier to knead.
Let me expand on how this all comes together to create the best challah ever.
Even when using a mixer, you will want to pause a few times. Turn off your mixer periodically to feel the dough and allow it to rest (about five minutes per break), and then begin the mixer once again. I knead my dough approximately six to eight minutes.
But is this all really that necessary?
Great question! And it leads me to my next question:
Why does my challah dough crack?
This topped my list of challah questions. Beautiful braided challah dough that splits and cracks along the braided seems when baking. This question is asked everywhere from Google to popular social media apps. Has this happened to me? More often than I would have liked.
So what did I learn? A few things. “Cracks” or “challah stretch marks” are caused by the dough pulling, which means active gluten and live, happy yeast. You may think your challah has taken a long enough second rise, but your yeast and dough might disagree with you. In colder temperatures and weather, your dough doesn’t necessarily get enough time to complete the final rise process.
When you place your challah into a hot oven, the temperature change rapidly affects the yeast and gluten, causing quick growth in a short amount of time. What can prevent this problem? Loosely braiding your dough as opposed to tightly braiding it will lessen the visibility of cracks and prevent them, but allowing your dough to rise until it is ready is the real remedy.
How do you know when it’s risen enough?
Simple. The fingertip bread method. Lightly press your finger on the strand or braid. This method is used to test if a dough has risen enough prior to baking. The tips of two fingers are pressed lightly and quickly ½ inch into the risen dough. If the dough indents, the dough has doubled in size and risen well.
If there is no give in the dough, meaning there is no indentation left behind, or if the dough feels firm, allow it to keep rising.

Another trick I use is visual. Take a picture of your dough right after braiding, and compare it to the present dough. My second rise time in the summer is as short at 15-30 minutes and as long as an hour in the winter. You will always get different answers about rise times regardless of who you ask, but when it comes down to it, it is all weather, climate, and temperature dependant.
You can also experiment with this method by baking a batch of challah first thing in the morning when your house is cooler and your oven has been off. Then bake another batch in the evening after cooking for Shabbos. Chances are you will notice a difference in the results.
How do I proof my yeast? (And all yeast related inquiries)
Take a breath. Relax. It’s not as difficult as you think.
When making a traditional challah recipe, whether by hand or machine, we begin with warm water, sugar, and yeast.
Don’t overthink the water temperature. You want the water warm. Comfortable. Not hot. Not scalding. Not cool. Not freezing. Just warm. Mix the water, sugar, and yeast gently. You can do this either with a spoon or by turning on your machine for a few short spins. Allow the yeast to feed off the sugar and begin to bubble. You don’t need to wait longer than 5 minutes when using active dry yeast. If it doesn’t bubble after 5 minutes, your yeast may be expired (always check expiration date) or the water temperature may be off.
I know there are some recipes that use instant yeast (the type you don’t need to proof or activate), but honestly I like to see life in my challah dough, and I want confirmation that my yeast is alive. There’s nothing worse than a rock hard ball of dough with no life to it. If your kitchen is slightly cool, cover your bowl with a clean kitchen towel and check back in five minutes. Even just a few bubbles on the surface is a green light. More bubbles should follow rapidly.
Next follow with oil, eggs, flour, and salt.
Do not add salt directly to the yeast, whether you are using a bread maker or any other method. Bottom line. Salt kills yeast. Use pink Himalayan sea salt when baking bread! This type of salt is full of minerals that are absorbed into the dough. Just like with sugar, the yeast feeds off of these and thrives.
One more time! When making challah by mixer or by hand the salt is added along with the flour. It’s usually the last ingredient. When using a bread maker, salt is added along with the wet ingredients, and the yeast is added last on top of the flour.

Rise Time/How and where to rise?
Once your dough comes together, spray a large bowl with non-stick cooking spray or spread a drop of oil around the bottom and slightly up the sides of the bowl. Then place your dough inside and cover with a clean and damp kitchen towel. The damp towel prevents the dough from becoming dry and allows the dough to keep stretching as it grows. Allow your dough to rise in a warm spot for at least an hour before checking on it.
Your dough should be at least double the size. Size is not everything, though, and the soft, pillowy, fluffiness of the dough is usually an indication of a good rise as well.
A few more fast challah facts:
- Little known fact: yeast doughs are often very forgiving.
- When it comes to portioning your dough do not, I repeat, do not rip or pull your dough. This causes the gluten distress and, in turn, causes your dough to stiffen.
- Instead, use a sharp knife to divide the dough into even balls. A kitchen scale comes in handy here but is not crucial.
- Once your dough is rolled (filled, braided, or whatever else you choose to do), allow it to take one last rest. The timing will again depend on the temperature of the environment you are working in. This can be anywhere from 10-15 minutes to 25-30 minutes.
- Brush challah using a pastry brush with a mixture of egg and a sprinkle of sugar or honey. If you prefer, use just a plain beaten egg or no egg at all. Yo out It’s all about personal preference. Remember; a challah recipe is just a guideline.
- If there is an egg allergy or for vegans, eggs in any challah can be omitted but there will be a need for extra liquid.
- Bake at 350 degrees Fahrenheit (convection or not) until lightly browned or dark and toasty. I like to bake my challahs on the second to lowest rack option. You may take the challah out of the oven and turn it over gently on your hand (please make sure you are wearing an oven mitt). If the bottom is lightly golden and the top isn’t soft or sinking, you are good to go. The challah will also continue to bake once it’s removed from the oven.
- To make sure the top is cooked well, I transfer the challah to the highest rack for the last few minutes of baking.
With these introductory tips and tricks, I hope I’ve at least taken a little of the mystery out of challah baking. Stay tuned for more answers to questions like:
- What kind of mixer should I get?
- What type of oil should I use?
- Which flour is best for challah?
And more!
Want to level up your Challah game even more? Check out our comprehensive step-by-step how to make challah bread guide


