There’s something so delicate and beautiful about dried, pressed flowers—they preserve a little piece of nature that you can enjoy all year long. In this article, we’re sharing a few easy and creative ways to turn those pretty petals into functional and decorative crafts. Each project is simple to make and adds a touch of natural charm to your home or gift giving.
DIY Pressed Flower Ceramic Vase
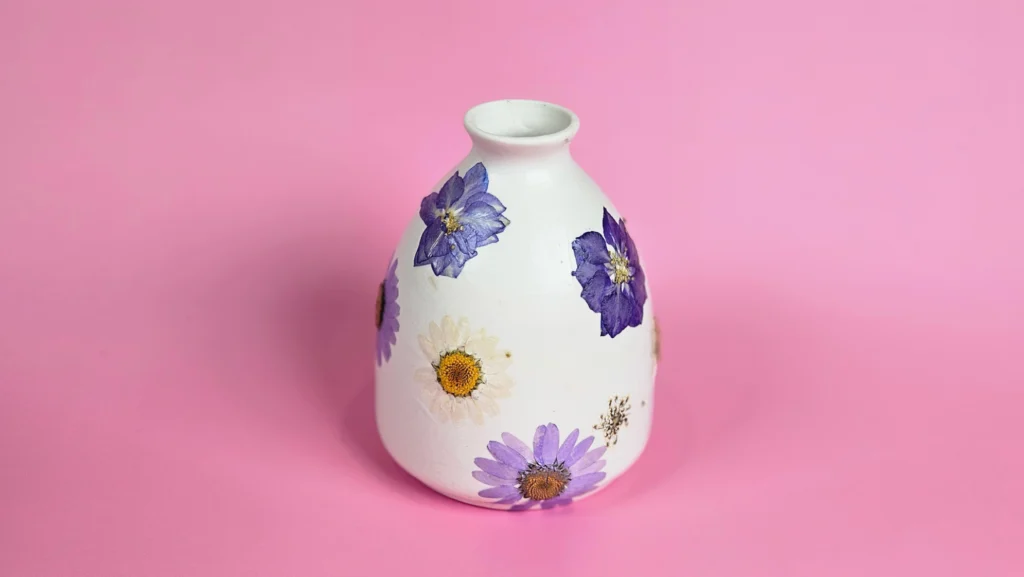
Capture the beauty of summer with this sweet and simple pressed flower vase. It’s the perfect way to bring those sunny vibes indoors and turn a plain ceramic vase into a cheerful, yet elegant summer decoration!
Supplies:
- Mod Podge (Matte works best for ceramic)
Instructions:
Step 1: Using a paintbrush, apply a thin layer of Mod Podge to the area of the vase where you want to place your pressed flower.
Step 2: Gently place the pressed flower on the vase. (Tweezers can help you handle delicate flowers more easily.)
Step 3: Once the flower is in place, brush a thin layer of Mod Podge over it to seal it onto the vase.
Step 4: Continue adding your pressed flowers to the vase until you've achieved your desired look.
Step 5: To give the entire vase a smooth, finished appearance, apply a thin layer of Mod Podge over the whole surface, including areas without flowers.
Step 6: Allow the vase to dry for about 1 hour before handling.
Sit back and admire your gorgeous new vase!
Pressed Flower Bookmark

Make a charming pressed flower bookmark by sealing your favorite dried blooms with Mod Podge for a personalized, nature-inspired way to mark your page.
Supplies:
Instructions:
Step 1: Using a paintbrush, apply a thin layer of Mod Podge to the area of the bookmark where you want to place your pressed flower.
Step 2: Gently place the pressed flower on the bookmark. (Tweezers can help you handle delicate flowers more easily.)
Step 3: Once the flower is in place, brush a thin layer of Mod Podge over it to seal it onto the bookmark.
Step 4: Continue adding your pressed flowers to the bookmark until you've achieved your desired look.
Pressed Flower Candle
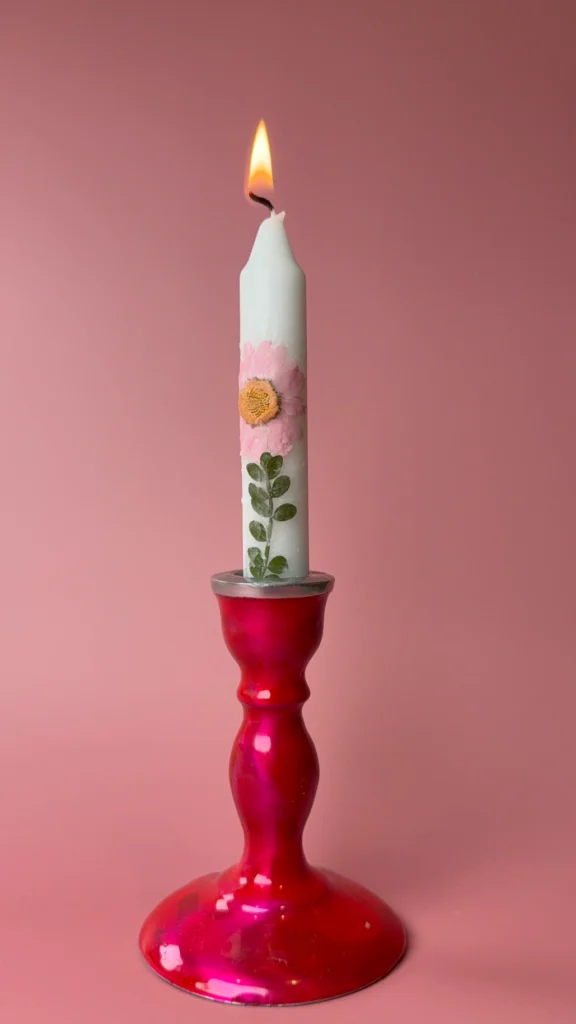
Turn an ordinary candle into something extra special! With just a few pressed flowers and a little melted wax, you’ll have a fancy floral candle that’s too pretty to light!
Supplies:
- Candle
- Matches or lighter
Instructions:
Step 1: Light the tea light and let it burn for a few minutes so a small pool of melted wax forms.
Step 2: Use the paintbrush to pick up a small amount of melted wax and apply it to the spot on the candle where you'd like to place your flower.
Step 3: Gently press the flower onto the waxed area. Hold it in place for a few seconds.
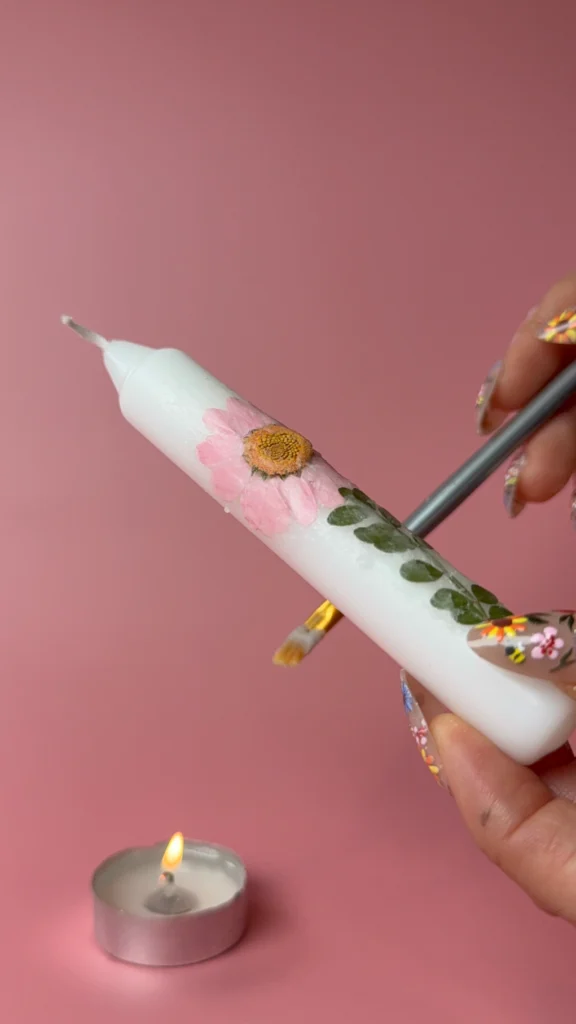
Step 4: Dip your brush back into the melted wax and carefully apply a thin coat over the flower to seal it to the candle
Step 5: Repeat the process with more flowers until you're happy with the look.
Enjoy your fancy new decorative candle!
Note: This is a decorative candle. If you choose to burn it, do not leave it unattended.
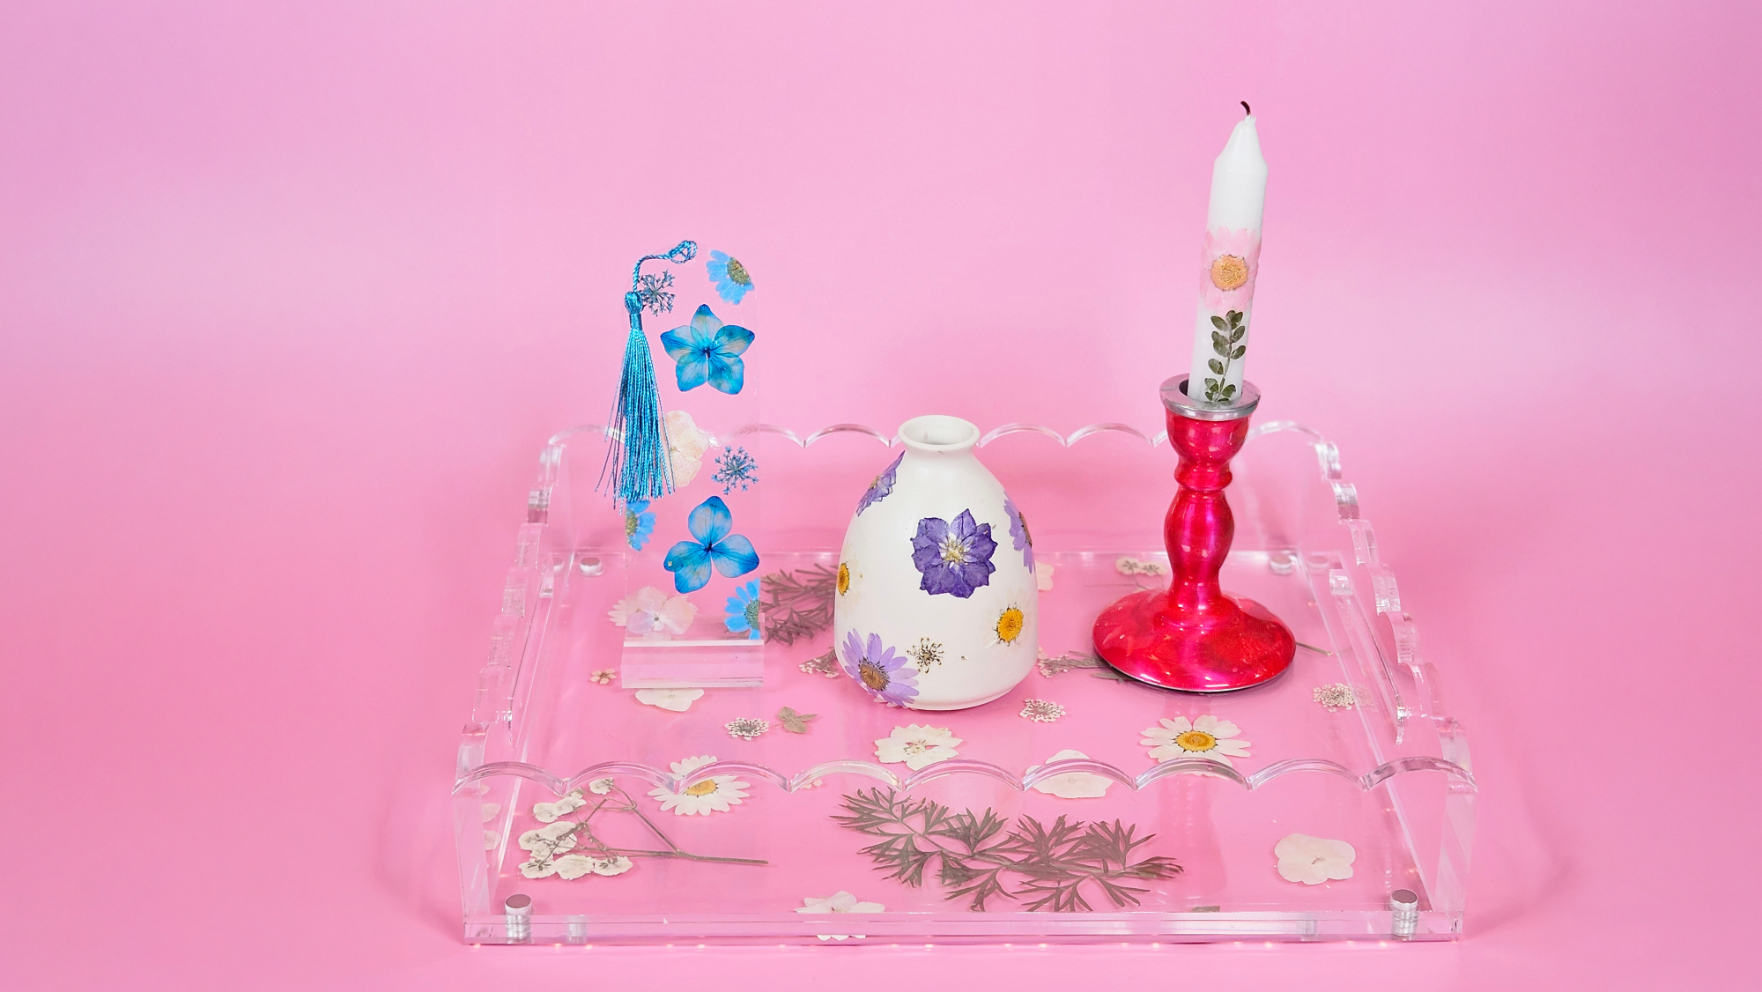
Pressed Flower Acrylic Tray
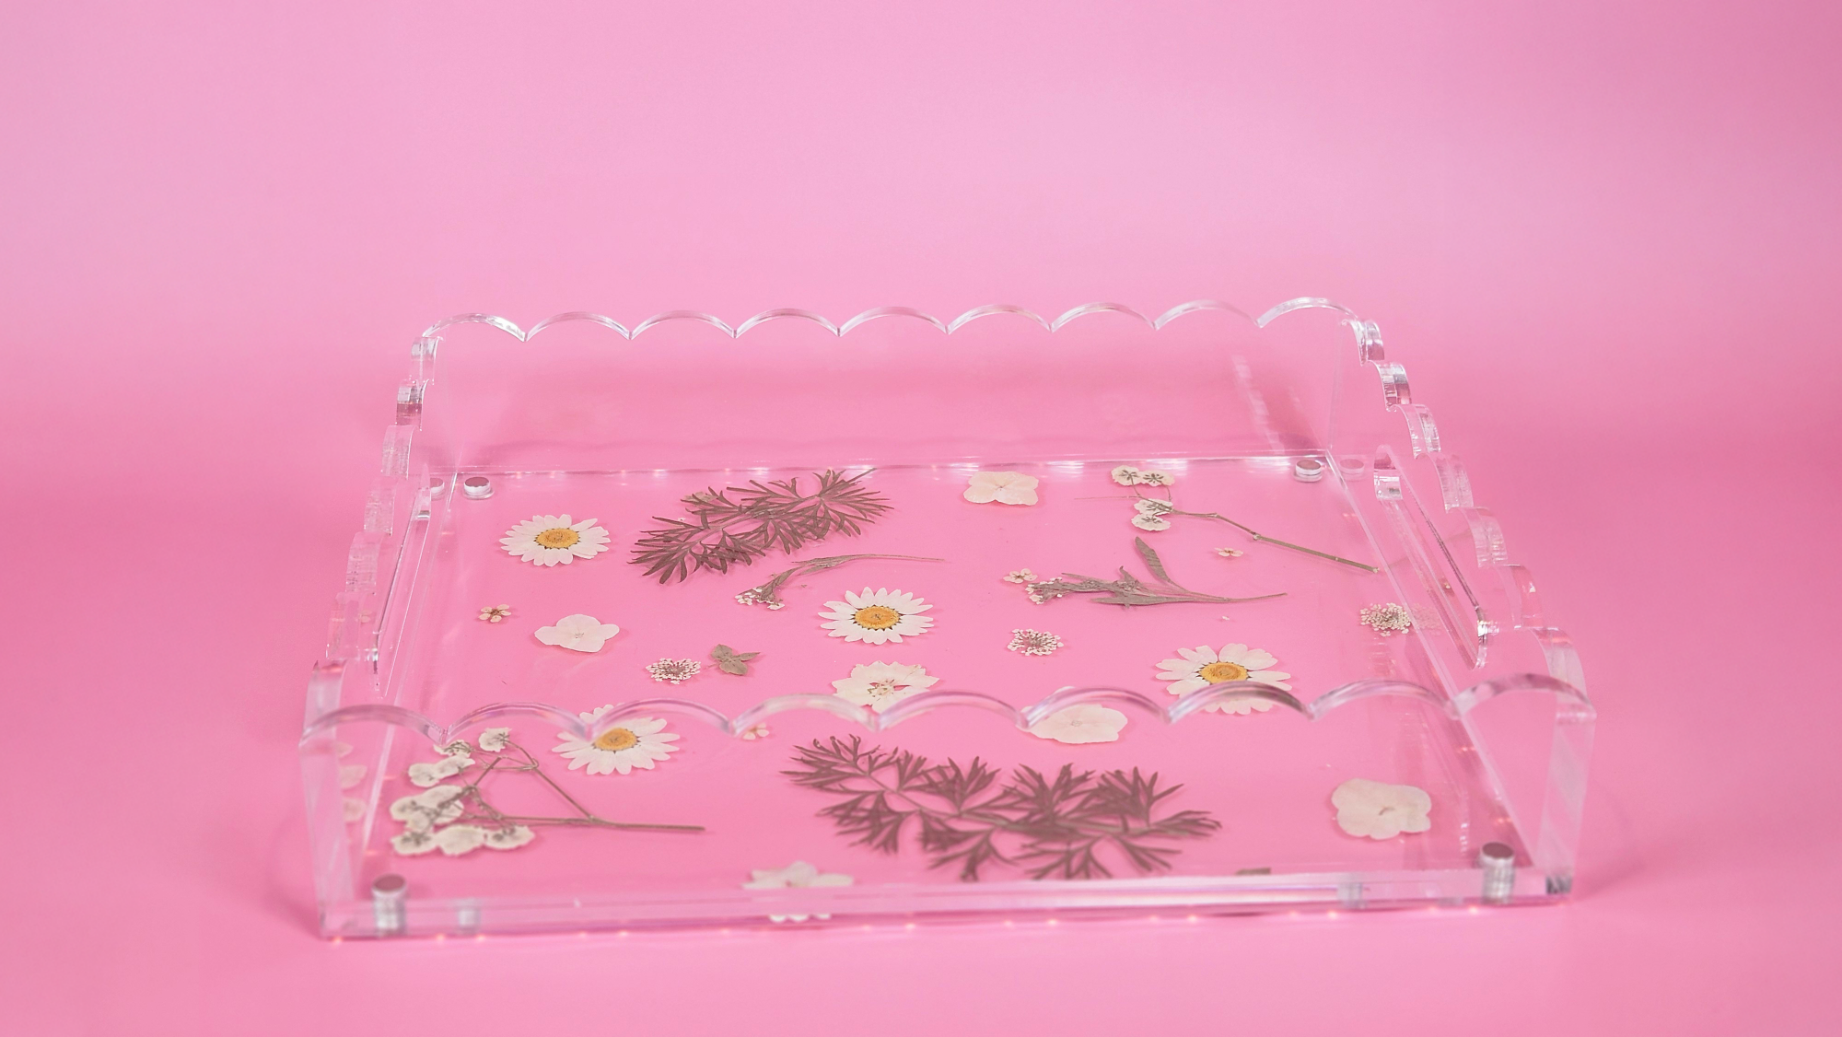
Want the look of a resin tray without much commitment? Enter magnetic pressed flower tray!
Supplies:
Instructions:
Step 1. Open the magnetic tray.
Step 2. Place pressed flowers to your linking.
Step 3. Attach the top of the tray to hold flowers in place.


When leaving comments on kosher.com we ask that you be respectful, appropriate, and stay on topic. Click here to read our full comment policy.
Kosher.com Commenting Guidelines
We love hearing from our community! Constructive feedback, tips, questions, and friendly engagement are encouraged.
By commenting on Kosher.com, you agree to follow these guidelines. Please note that comments are for community discussion only and should not be considered halachic guidance—always check with your own Rabbi or LOR.
1. Be Respectful
2. Keep It Appropriate
3. Protect Privacy
4. Stay On Topic
5. Moderation