Do you remember seeing the Menorah lit for the first time as a child? My sister and I are both born in early December, and after blowing out candles for the first time, we had our first Chanukah. It was hard for us to resist the temptation of reaching out to touch the candles, to actualize the story our grandfather told us about Judah Maccabee and the miracle of the Menorah and how the oil burned for eight days instead of one.

As an adult I still enjoy listening to the story, but as a child I always wanted to play with candles. I wish I had known about melt wax!
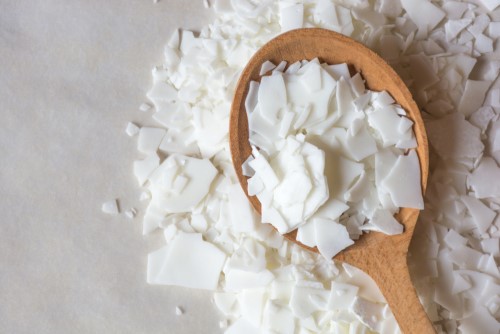
WHAT IS MELT WAX?

Melt wax is candle wax ready to be used for art projects. Common non-toxic waxes and candles are made from vegetable oil. You can buy melt wax kits or use Chanukah candles from the box–now you don’t have to throw away the ones that break!
Generally speaking, these melted wax crafts are best suited for ages 12+. Melt wax doesn’t need a lot of heat, so you don’t need to play with fire for any of these projects. Just use a craft tool or blow dryer on a low heat setting to start them melting!
It’s best to work with melt wax in tiny chunks, about the size of sprinkles or coarse sand. Need to break up your wax? Put it in a plastic bag, freeze it, and then use a rolling pin to help crush it up.
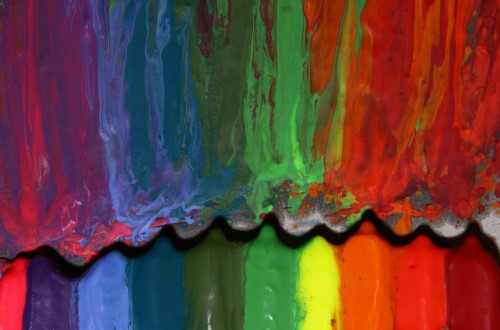
CHANUKAH CANDLE DRIP MELT WAX ART
This project is a great introduction to melt wax because it gives the kids a chance to experiment with melt wax and discover how they enjoy creating with it best–do they enjoy using melt wax to make shapes, scenes, messages, colorful abstract patterns? It’s easy enough to try them all!
You Will Need:
- A cleared space on a table
- Chanukah candles
- Paper or canvas
- Popsicle sticks
- A craft heat tool or hair dryer
1. Secure the candle to the popsicle stick with tape or string so that the wick points towards you. At least half of the candle should hang over the popsicle stick.
2. Hold the popsicle stick over the canvas and hold the heat source over the candle so that it blows towards the table. The wax will start to melt and fall straight down onto the canvas. You can design patterns, write messages, create constellations–have fun getting colorful and creative!
Alternatively, you can arrange the candles on your canvas and wave your heat source over them so that they melt right onto the paper. This enables you to experiment with blending colors and “rivers” of wax.
If you change your mind about where to put a melt wax drop or make a mistake, wait about 60 seconds for it to cool down and solidify. You can then easily scrape it off with the popsicle stick.
FOIL CANVAS
This method is great for those with an artistic vision… instead of using paint, their masterpieces will feature wax, which will help the scene or subject (literally) jump off the page!
You Will Need:
- A piece of cardboard, newspaper, or magazine to cover your surface
- Paper or canvas
- Non-toxic candle wax or crayons
- Popsicle sticks
- Aluminum foil sheet large enough to cover the canvas
- A craft heat tool, iron, or hair dryer
- small towel or oven mitt
1. Have the kids spoon piles of the wax melt onto the canvas. They can use popsicle sticks to push the piles around and into designs. Some kids might like to draw an outline of a shape or object which can be covered with wax. Others might enjoy a more “freehand” approach or experimenting with more abstract colorful designs.
2. Once the designs are ready on your canvas, gently cover the canvas with aluminum foil. Press it down over the edges of the canvas and then gently press it down to the canvas, leaving a little room to breathe.
3. Run a craft heat tool or hair dryer on low heat roughly an inch above the surface of the foil. The wax will melt easily so you don’t need to get everything too hot, just make sure you make two to three passes over the canvas.
4. With an oven mitt or towel, gently smooth over the foil as needed. Wait about a minute for it to cool, then peel back the foil by rolling it towards you–this will help the foil separate from the wax properly.
5. Viola! The masterpiece is ready for framing, friends, or the fridge.
WAX STAINED GLASS
This method is great for creating standalone art or a unique start to other projects like craft jewelry, embroidery, and more.
You Will Need:
- Two equal sized sheets of wax paper
- Non-toxic wax melt or crushed candles
- A heating tool
1. Lay out the first sheet of wax paper. Sprinkle or arrange the wax over.
2. Place the other wax paper sheet on top like a sandwich.
3. Run an iron or other heating device over your wax paper and watch the colors melt and merge! Once the wax has melted, let it cool. Then it can be cut into shapes for jewelry, costumes, or other projects!
Which projects sound good to do with your family? Whether you’re making molds or masterpieces, your kids will be sure to marvel at melted wax!