A few weeks ago, I showed you how to make the super trendy, super delicious hot cocoa bombs. Now, I’m back with a new take for those of you who prefer their hot drinks a little fruitier or more on the herbal side- Tea Bombs!
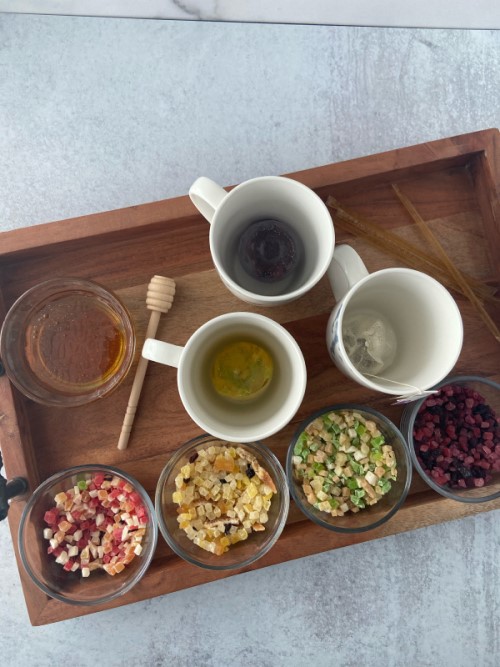
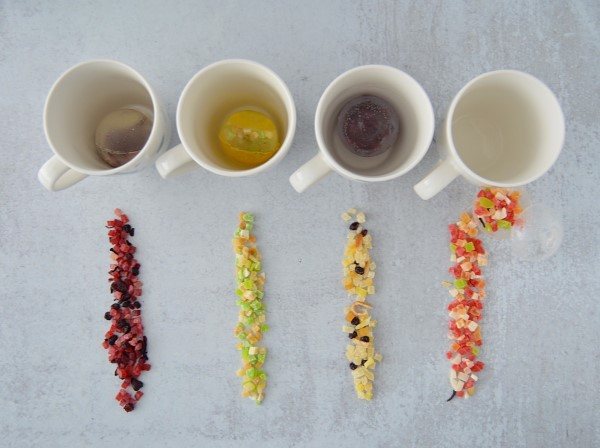
Now, I personally, am not a tea drinker, and never have been, but a few years ago I was introduced to “shuk tea.” Shuk tea is basically chopped up colorful dehydrated fruit, edible flowers, and spices that you can buy by weight in tons of colors (and flavors) in Machane Yehuda, the main open-air market in Jerusalem. You put a scoop in your cup, add hot water, and let it steep for five minutes. You end up with delicious tea, and when you’re done, you get to eat all the yummy stuff at the bottom. Until recently, I was reliant on people bringing it back from their travels, but shuk tea has made its way stateside. Just in time, too, because it is the perfect colorful filling for tea bombs!
(Don’t worry, if you can’t get your hands on shuk tea, tea bags will work just fine for this project.)
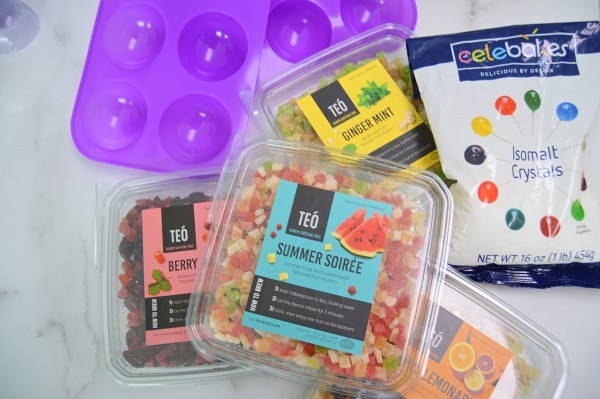
Here’s what you will need:
- Isomalt: this is a sugar substitute that comes in little pellets. It is much easier to cook and handle than real sugar so there is less room for error. You can find it on Amazon.
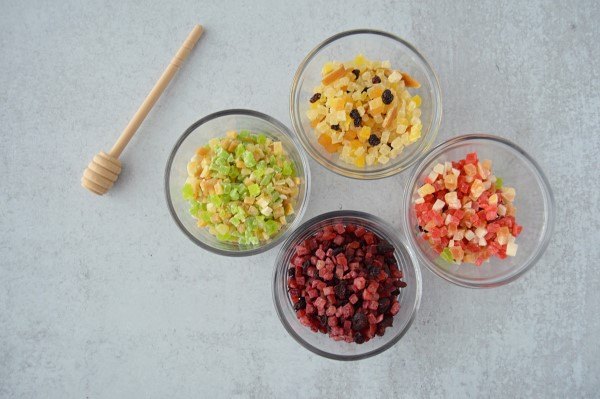
- Shuk tea or tea bags: get your favorite flavors of tea. I used a colorful variety of flavors. I also used Passion tea and mint tea bags.
- Candy thermometer: Though not essential when using isomalt, it is helpful.
- Molds: Silicone is key when working with sugar, unless you have plastic ones that are heat-proof up to at least 400 degrees Fahrenheit. I used a 60-mm size (about 2-inch). Anything larger will be really sweet.
- Gel food coloring (optional): I played around with colors when making these, but they’re beautiful clear as well.
- Gloves: Working with sugar can be dangerous, as the working temperature is around 300 degrees Fahrenheit. This isn’t a project for kids, and gloves should be worn to avoid burns. They make gloves specific for sugar work, but if you don’t want to invest, layer a few pairs of vinyl gloves and work carefully.
How to:
1. Start by preheating your oven to 300 degrees Fahrenheit and preparing a bowl of ice water that your pot can fit in.
2. Measure out one cup of isomalt into a heavy bottomed saucepan.
3. Add 1/4 cup hot water. (Package instructions call for distilled water, but I just used boiled water from my kettle.)
4. Let the isomalt melt on medium high heat, DO NOT STIR. The pellets will start to melt and turn into a clear liquid. Allow it to boil until all the pellets are melted – around 330 degrees Fahrenheit on a thermometer (if you are using one). At this point, remove it from the stove and dunk the bottom of the pot into your ice water for about five seconds (until the hissing stops) to stop the cooking.
5. Placing your pot in the oven for 15 minutes will help reduce the bubbles in your isomalt. If you don’t mind them, skip this step. Have your molds ready to go; you will need to work fast with the sugar.
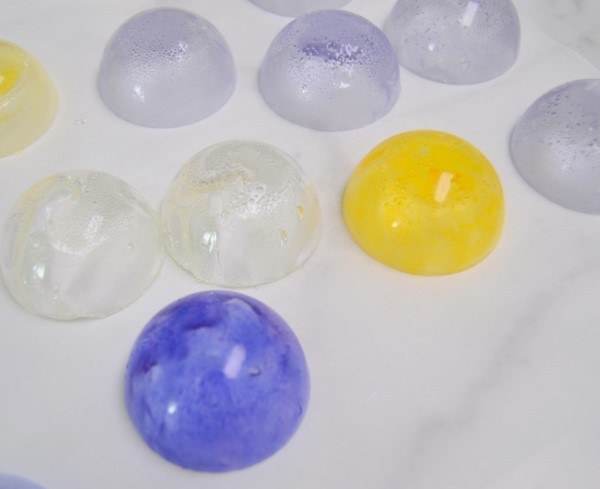
6. Using a spoon, scoop about two teaspoons of sugar into your mold and quickly bring it up the sides using the back of the spoon. Work one cavity at a time, because the sugar will immediately start to cool once you transfer it to the room-temperature mold.
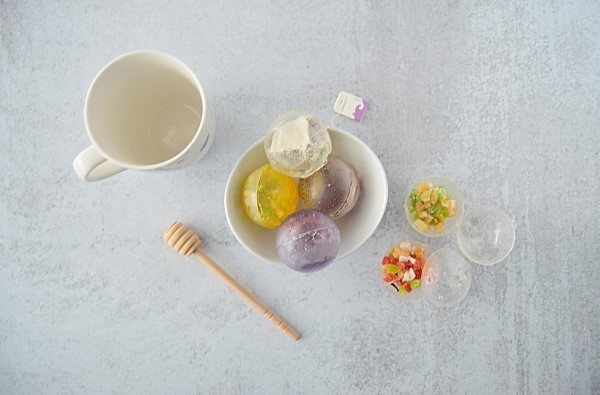
7. If you’re adding color, place a drop in your sugar once in the mold, and mix it quickly (you could also color the whole batch while on the stove if you prefer). The sugar will set in the mold quickly, no need to refrigerate.
8. Once it is cool to the touch, carefully pull the sides of the mold, then push from the bottom to remove. Be careful! The shells are very delicate. (I broke several in this process.)
9. Line up your shells and place one tablespoon of your shuk tea, or one folded up tea bag, in half of the shells. These will be the bottoms of your tea bombs.
10. You will need to heat the top halves to seal your tea bombs. I found the best way to do this was with a pastry torch, but since not everyone has one, you can use a warm nonstick pan. Again, make sure you are wearing gloves and working carefully. Place your shell, open side down, on the hot surface of the pan until it melts a bit, then quickly stick it to the bottom half to seal.
The nice thing about isomalt is that it is more resistant to humidity than sugar, so it won’t get as sticky over time. Still, if you don’t plan to use your tea bombs right away, the best way to store them is in an airtight container, ideally with a silica packet to absorb excess moisture.
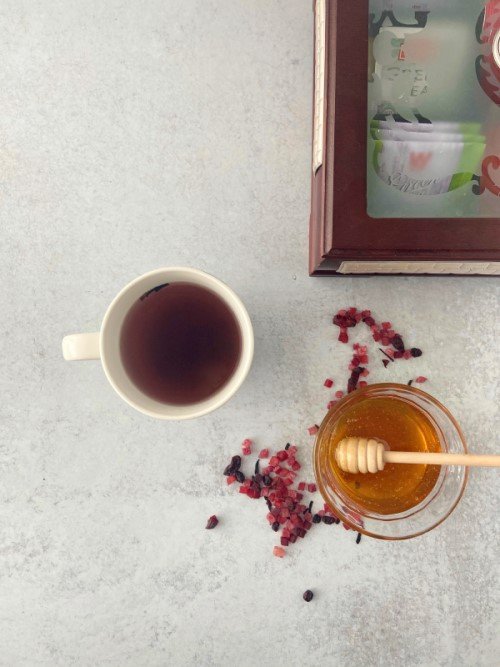
When ready, place one bomb in the bottom of your mug, add hot water, steep five minutes, and enjoy! Oh, but don’t forget to take a picture first and share with me on Instagram @sweettoothstl